In this tutorial, we are going to learn how we can integrate Fullcalendar with Laravel 8 and Vue.js 3.
Table of contents
- Create new Laravel project
- Configure database credentials
- Configure Event Model
- Configure Event Controller
- Install Vue.js 3
- Install and Configure Fullcalendar
- Fetch Events
- Github Repo
1. Create new project.
Create new project using this command
composer create-project laravel/laravel laravel-vue-fullcalendar
2. Configure Database Credentials.
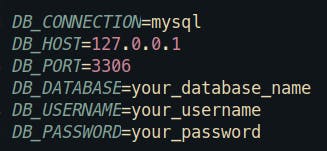
In your .env edit your database credentials.

3. Configure Model Event
In your terminal execute this command
php artisan make:model Event -mf
It will generate a migration and factory.
Let's go to our migration, located database/migrations, open the event migration:
  public function up()
    {
        Schema::create('events', function (Blueprint $table) {
            $table->id();
            $table->string('title');
            $table->date('start');
            $table->date('end');
            $table->timestamps();
        });
    }
Search for your Event model in app/Models/Event.php, add edit it like this.
 protected $fillable = [
        'title',
        'start',
        'end'
    ];
Now, we can go to database/factories/EventFactory.php, put the following code
public function definition()
    {
        return [
            'title' => $this->faker->word(),
            'start' => $this->faker->dateTimeBetween('2021-11-8', '2021-11-10'),
            'end' => $this->faker->dateTimeBetween('2021-11-10', '2021-11-14'),
        ];
    }
Next step is to go to database/seeders/DatabaseSeeder.php and add the factory
public function run()
    {
        Event::factory(5)->create();
    }
The final step in this section is execute
php artisan migrate:fresh --seed
4. Configure Event Controller
We need to create a new controller
php artisan make:controller EventController
Let's open the new controller app/Http/Controllers/EventController.php
<?php

namespace App\Http\Controllers;

use App\Http\Resources\EventResource;
use App\Models\Event;
use Illuminate\Http\Request;

class EventController extends Controller
{
    public function index()
    {
        return EventResource::collection(Event::all());
    }
}
For this example, only the need the index method, don't worry if we don't have an EventResouce yet, let's go to our terminal execute
php artisan make:resource EventResource
Now, we can open the resource app/Http/Resources/EventResource.php edit it like this
  public function toArray($request)
    {
        return [
            'title' => $this->title,
            'start' => $this->start,
            'end' => $this->end
        ];
    }
Finally, in routes/api.php define our route
Route::get('/events', [EventController::class, 'index'])->name('events.index');
Note: Don't forget to import the controller
5. Install Vue.js 3
To install vue.js 3 execute this command in your terminal
npm install vue@next vue-loader@next
We need to enable vue-loader, go to webpack.mix.js and add vue()
mix.js('resources/js/app.js', 'public/js').vue()
    .postCss('resources/css/app.css', 'public/css', [
        //
    ]);
6. Install and Configure Fullcalendar
To install Fullcalendar execute
npm install --save @fullcalendar/vue3 @fullcalendar/core @fullcalendar/daygrid
We can create a new component, inside resources/js create a new folder called components inside this folder, create this file FullCalendarComponent.vue, now open FullCalendarComponent.vue and add this code
<template>
    <div>
       <FullCalendar :options="calendarOptions"  />
    </div>
</template>
<script>

import '@fullcalendar/core/vdom' // solves problem with Vite
import FullCalendar from '@fullcalendar/vue3'
import dayGridPlugin from '@fullcalendar/daygrid'

export default {
  components: {
    FullCalendar // make the <FullCalendar> tag available
  },
 data() {
    return {
      calendarOptions: {
        plugins: [ dayGridPlugin ],
        initialView: 'dayGridMonth',
        events: [
          { title: 'event 1', date: '2021-11-11' },
          { title: 'event 2', date: '2021-11-05' }
        ]
      }
    }
  }}
</script>
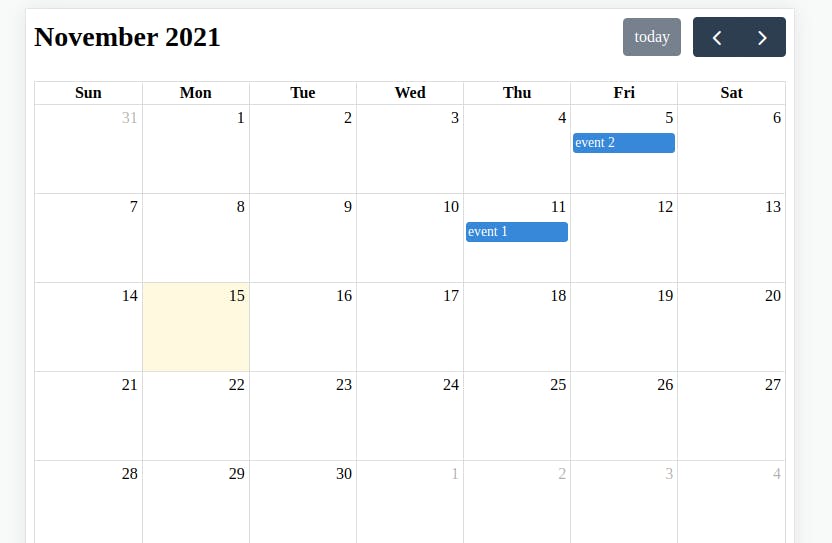
Right now, we can leave this component like that, just to test if the calendar works.
Let's go to resources/js/app.js and put this code
require('./bootstrap');

import FullCalendarComponent from './components/FullCalendarComponent.vue';
import { createApp } from 'vue';

const app = createApp({});

app.component('calendar', FullCalendarComponent);
app.mount('#app');
It's time to display the component, go to resources/views/welcome.blade.php
<!DOCTYPE html>
<html lang="{{ str_replace('_', '-', app()->getLocale()) }}">

<head>
    <meta charset="utf-8">
    <meta name="viewport" content="width=device-width, initial-scale=1">

    <title>Laravel</title>
    <link href="{{ asset('css/app.css') }}" rel="stylesheet">

</head>

<body class="antialiased">

    <div id="app">
        <calendar />
    </div>

    <script src="{{mix('js/app.js')}}"></script>
</body>

</html>
Let me explain this code
We need to use mix('js/app.js') to load our configuration (Fullcalendar and Vue.js) and prevent cache.
<calendar />it comes from resources/js/app.js, when we defineapp.component('calendar', FullCalendarComponent);
Everything is ready to execute
npm run dev
or
npm run watch
After that, you should see this

This works!!!
7. Fetch Events
Remember in the previous step we put the events in our FullCalendarComponent hardcoded, in this step we are fetching our dates from database like this
<template>
    <div>
       <FullCalendar :options="calendarOptions" />
    </div>
</template>
<script>

import '@fullcalendar/core/vdom' // solves problem with Vite
import FullCalendar from '@fullcalendar/vue3'
import dayGridPlugin from '@fullcalendar/daygrid'

import axios from 'axios'

export default {
  components: {
    FullCalendar // make the <FullCalendar> tag available
  },
  data() {
    return {
      calendarOptions: {
        plugins: [ dayGridPlugin ],
        initialView: 'dayGridMonth',
        eventSources: [
            {
              events: function(fetchInfo, successCallback, failureCallback) {

                axios.get('/api/events').then(response => {
                    successCallback(response.data.data)
                });
              }
            }
          ]
      },
    }
  },
}
</script>
- We add eventSources and inside that, we put the events fetching through axios.
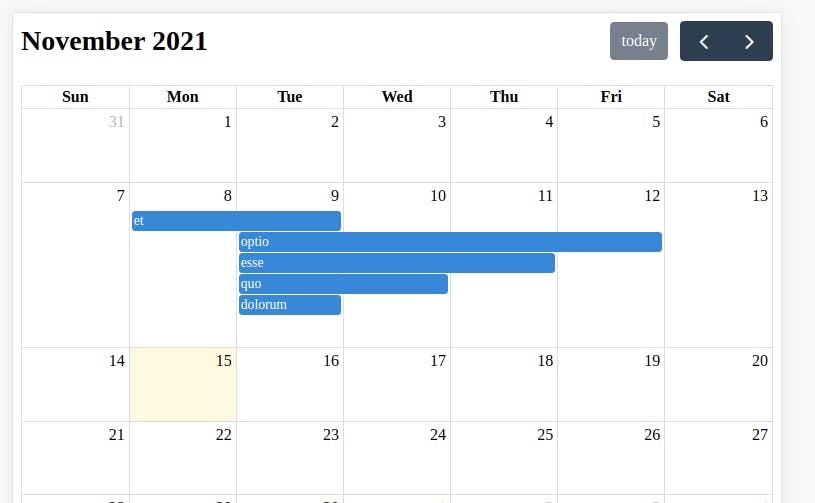
If everything is ok you should see the events on the calendar

Note: If you want to handle the click on every date you need to install @fullcalendar/interaction plugin.
If you want more information about Fullcalendar, check the official documentation in this link Fullcalendar Official Docs
8. GitHub Repo
FullCalendar Laravel 8 Vuejs 3
If you have any doubt leave a message in the comment section.
Happy coding ☕. Thanks for reading 🙏.
