Laravel Livewire Dependent Dropdown

I'm a self-taught web developer who likes sharing my knowledge, helping people.
In this tutorial, you will learn how to implement a dependent dropdown using Laravel 8.x and Livewire 2.x
Table of contents
- Create new Laravel project
- Set up database credentials
- Country and City model, migration, and seeder
- Install Laravel Livewire
- Create Livewire component
- CountryDropdown Component
- Github Repo
1. Create new Laravel Project.
Create a new Laravel project with this command
composer create-project laravel/laravel Laravel-Livewire-Dependent-Dropdown
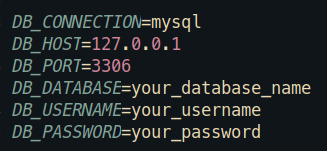
2. Set up database credentials
You need to configure your credentials in the .env file.
3. Country and City model, migration, and seeder.
In this step, we need to create two models one for countries and the other for cities, to do that execute the following command
php artisan make:model Country -ms
php artisan make:model City -ms
Note: the flag -ms means migration (m), seeder (s)
Great!!!. Now we can configure our migrations. Let's go to the migrations folder. Locate in app/database/migrations/ and first we need to edit Country migration
 public function up()
    {
        Schema::create('countries', function (Blueprint $table) {
            $table->id();
            $table->string('name');
            $table->timestamps();
        });
    }
Now, it's the turn to edit the City migration
  public function up()
    {
        Schema::create('cities', function (Blueprint $table) {
            $table->id();
            $table->string('name');
            $table->foreignId('country_id')->nullable()->constrained();
            $table->timestamps();
        });
    }
Ok, everything looks good, it's time to edit the models. Let's go to app/Models/Country.php and add this line.
protected $fillable = ['name'];
At this moment, we have to edit the City model.
protected $fillable = [
        'name',
        'country_id'
    ];
That's it, just edit each seeder, firstly we need to search the country seeder located at app/database/seeders/CountrySeeder.php and add this code
public function run()
    {
        $countries = [
            [
                'name' => 'Canada'
            ],
            [
                'name' => 'Italy'
            ]
        ];

        foreach ($countries as $country) {
            Country::create($country);
        }
    }
We can edit the app/database/seeders/CitySeeder.php file adding this code
   public function run()
    {
        $cities = [
            [
                'name' => 'Toronto',
                'country_id' => 1 //Canada
            ],
            [
                'name' => 'Ontario',
                'country_id' => 1
            ],
            [
                'name' => 'Florence',
                'country_id' => 2 //Italy
            ],
            [
                'name' => 'Palermo',
                'country_id' => 2
            ]
        ];

        foreach ($cities as $city) {
            City::create($city);
        }
    }
Note: Don't forget to import the appropriate model in each seeder.
Finally, in the app/database/seeder/DatabaseSeeder.php add this code.
  public function run()
    {
        $this->call([
            CountrySeeder::class,
            CitySeeder::class
        ]);
    }
Note: To prevent errors put always in first place CountrySeeder::class
The final step in this section is run
php artisan migrate:fresh --seed
Cool!!! Everything is ready to incorporate Laravel Livewire in the next section.
4. Install Laravel Livewire.
Run this command
composer require livewire/livewire
In order to make Livewires works, we need to configure the app/resources/views/welcome.blade.php file like this
<!DOCTYPE html>
<html lang="{{ str_replace('_', '-', app()->getLocale()) }}">

<head>
    <meta charset="utf-8">
    <meta name="viewport" content="width=device-width, initial-scale=1">
    <title>Laravel</title>
    <link href="https://unpkg.com/tailwindcss@^2/dist/tailwind.min.css" rel="stylesheet">

    @livewireStyles
</head>

<body>


    @livewireScripts
</body>

</html>
Note: I'm going to use TailwindCSS CDN to keep this tutorial simple. Don't worry if you see a blank page later in this guide will fix that.
5. Create Livewire Component
To create a Livewire component execute this command
php artisan make:livewire CountryDropdown
This generates this output

6. CountryDropdown Component
We need to modify the app/Http/Livewire/CountryDropdown.php file adding this code
<?php

namespace App\Http\Livewire;

use App\Models\City;
use App\Models\Country;
use Livewire\Component;

class CountryDropdown extends Component
{
    public $countries = [], $cities = [];
    public $country, $city;

    public function mount()
    {
        $this->countries = Country::all();
        $this->cities = collect();
    }

    public function updatedCountry($value)
    {
        $this->cities = City::where('country_id', $value)->get();
        $this->city = $this->cities->first()->id ?? null;
    }

    public function render()
    {
        return view('livewire.country-dropdown');
    }
}
I'm going to explain this code.
In the mount() method, we load all the countries available to store in our variable $countries also create an empty collection in the variable $cities.
The magic comes here in the updatedCountry() function, this runs after $country is updated, or in this case, every time we made a change in the country select, when
$countrychange, we took this value and we can do an Eloquent query selecting only the cities belongs to the Country selected. If you want to learn more about this, you can visit Livewire Lifecycle Hooks$this->city = $this->cities->first()->id ?? nullthis line means every time the country select change, the cities select will display the first city only when the country select is not null
In this step, we need to search the file app/resources/views/livewire/country-dropdown.blade.php and put this code to generate two selects to display the country and city information
<div>
    <div class="col-span-6 sm:col-span-3">
        <label for="country" class="block text-sm font-medium text-gray-700">Country</label>
        <select id="country" name="country" class="mt-1 block w-full py-2 px-3 border border-gray-300 bg-white rounded-md shadow-sm focus:outline-none focus:ring-indigo-500 focus:border-indigo-500 sm:text-sm" wire:model="country">
            <option>--- Select a country ---</option>
            @foreach($countries as $country)
            <option value="{{$country->id}}">{{$country->name}}</option>
            @endforeach
        </select>
    </div>
    <div class="col-span-6 sm:col-span-3 mt-3">
        <label for="city" class="block text-sm font-medium text-gray-700">City</label>
        <select id="city" name="city" class="mt-1 block w-full py-2 px-3 border border-gray-300 bg-white rounded-md shadow-sm focus:outline-none focus:ring-indigo-500 focus:border-indigo-500 sm:text-sm" wire:model="city">
            @if($cities->count() == 0)
            <option>You have to select a country before</option>
            @endif
            @foreach($cities as $city)
            <option value="{{$city->id}}">{{$city->name}}</option>
            @endforeach
        </select>
    </div>
</div>
The final step in this tutorial is displaying the component, let's go to the welcome.blade.php in add this code.
<div class="grid place-items-center h-screen">
        <div class="py-4 px-8 bg-white shadow-lg rounded-lg">
            <div class="mb-4 mt-4">
                <h2 class="text-gray-800 text-3xl font-semibold">Laravel Livewire Dependent Dropdown</h2>
            </div>
            <livewire:country-dropdown />
        </div>
</div>
As you can see, we add the component with <livewire:country-dropdown/>.
If everything is correct you should see this.


![How To Create Admin Panel using Filament [TALL STACK]](/_next/image?url=https%3A%2F%2Fcdn.hashnode.com%2Fres%2Fhashnode%2Fimage%2Fupload%2Fv1639173022637%2F4BT9qk5g3.png&w=3840&q=75)

